

How To Add Audio Clip To Google Blog
How To Add Your Own Audio Version to Your Blog Posts
A quick and easy guide to recording and publishing narrated articles
![]()
One of the easiest ways to make yourself stand out on Medium is to include audio recordings. It's not just for accessibility, though it certainly does help for visually-impaired readers. It's a way to humanize yourself, to give your readers, your community, another part of yourself.
They can hear your voice, delivering your own words; it's almost like they're having a conversation with you.
And thanks to Medium's wonderful flexibility as a platform, it's really easy to do. You don't have to have any kind of fancy recording equipment or a studio setup.
All you need are:
- A microphone. If you're on a laptop, chances are fairly good that you have an integrated microphone. I'm sure there's also a way to do this using your cell phone to record the audio and then moving it to your computer to upload and publish. But I imagine recording it on your computer will sound cleaner and more professional. I use a fairly inexpensive USB microphone.
- Audacity. It's a free, open-source software for recording and mixing audio. It might look scary to use, but we're only using it's basic functionality here.
- A SoundCloud account. If you have the finances for it, you might consider going Pro, just for the unlimited recording time. But for my uses, the free account has worked fine.
Part 1: Audacity

Whe n you open Audacity, this is what it looks like. And while there are a lot of complicated-looking options, there's very little that you actually need to play with here. The first thing, you want to do is to make sure you have the correct microphone selected
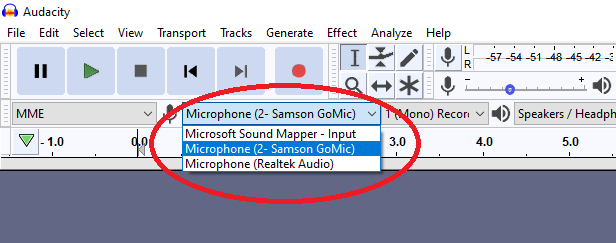
as well as the correct headphones/speakers/playback device.

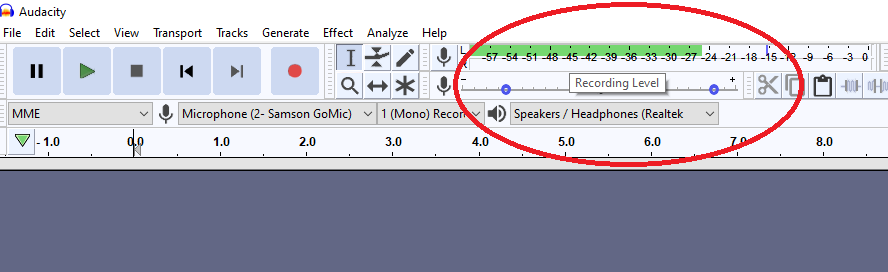
If you want to test your microphone to make sure it's working, click where it says "click to start monitoring" and start talking. If you see the green bar move with your voice, it means the microphone is picking you up.
Once you're sure that everything is set up, it's time to start recording. Once you're ready to start, click the red record button and start talking.
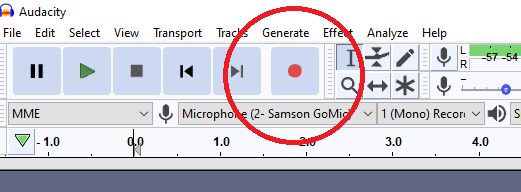
Because my own pieces are fairly short, I try to record everything in one take. Meaning, if I screw up, instead of trying to edit the audio, I throw it out and start over. Audacity has the tools to go in and cut out errors, but I find that it has a kind of unnatural sound to it. I prefer to get everything in one.
Once you're done recording, press the stop button. Press the play button to listen back to your recording, and make sure it sounds good. Yes, it can be a little strange to hear your own voice, but press through it. Just make sure there are no errors and everything sounds right.
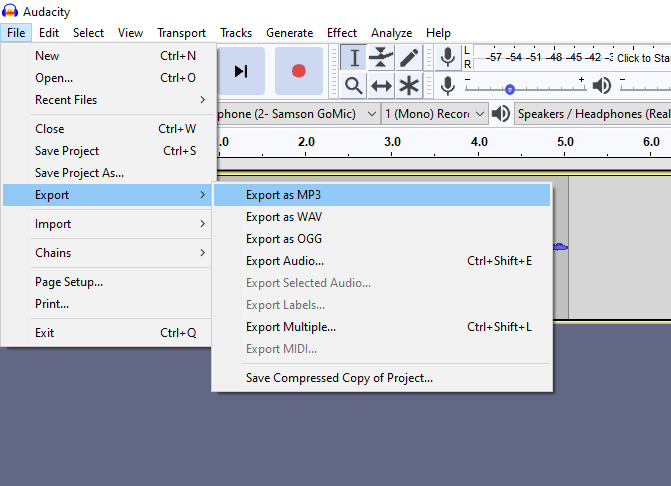
Once you're happy with the audio, you'll want to go to File -> Export -> Export as MP3.
First, this brings up the traditional file save dialogue. I wouldn't mess with any of the options here. Just pick a file name and a location to save it.
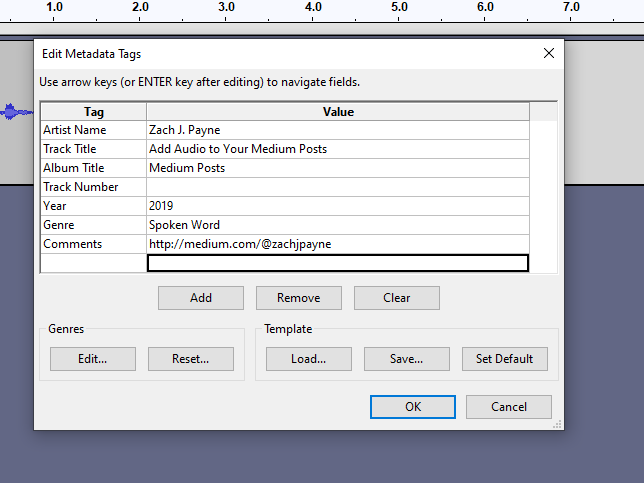
After the save dialogue, a metadata dialogue will open.
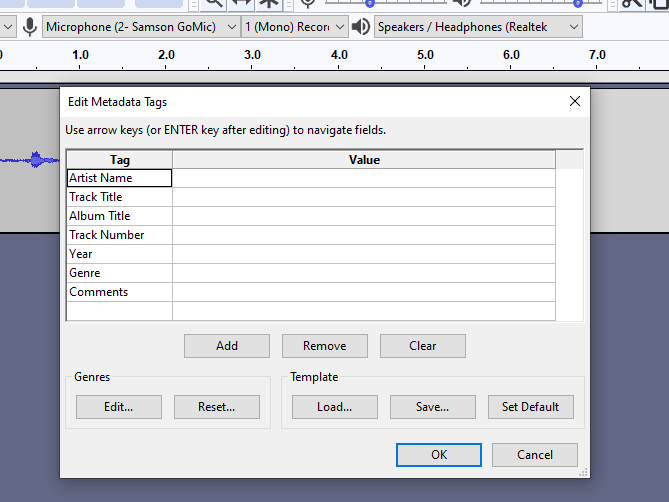
This will allow you to manipulate the metadata that gets attached to the MP3 file. Usually, this is where I'll put in my name and information about the blog post.
Once this dialogue closes, you're officially done with Audacity. You can close out and go to SoundCloud.
Part 2: SoundCloud
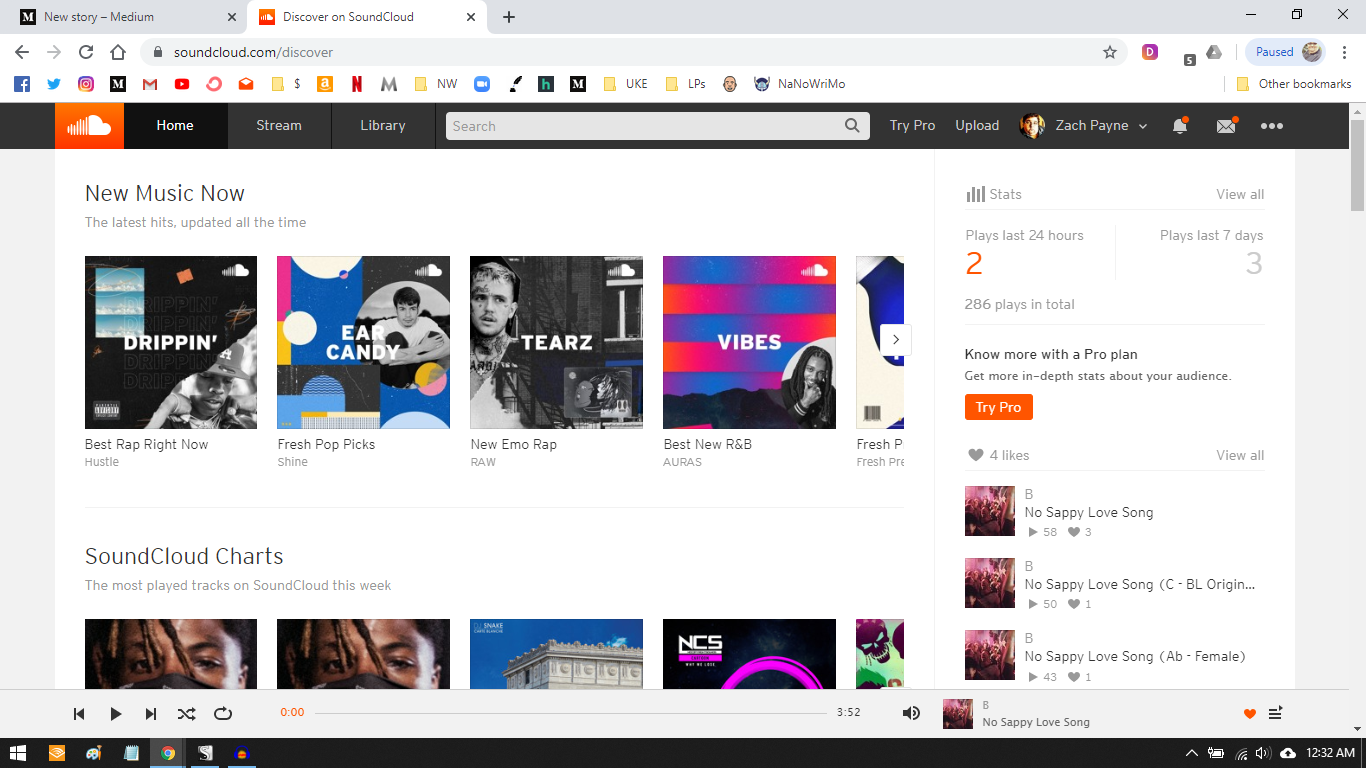
Once you've created and logged in to your SoundCloud account, uploading a file is easy. Simply click the upload button on the top of the navigation bar, and you'll be taken to the upload page.

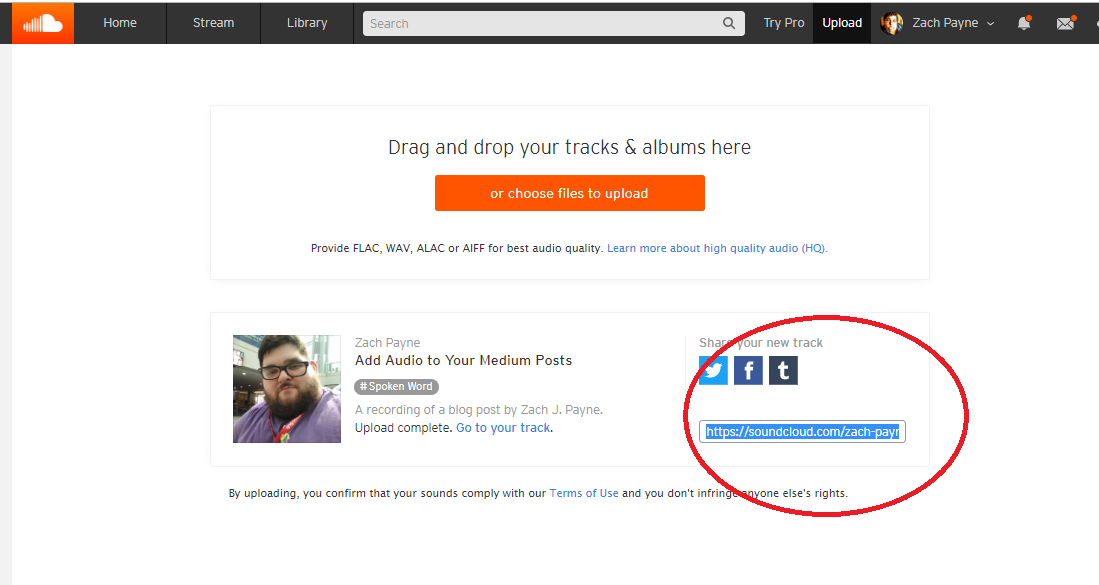
That will bring you to an info page, where you can fill out the information about your audio recording. I usually don't mess around with the metadata or permission tags. I just fill out the basic information and select a photo for the cover art.
Make sure that you've selected the recording as public.

Once you've finished, hit the save button, and SoundCloud will automatically take you to a success screen. Under the "share your track" section, highlight and copy the URL that they give you.
Part 3: Medium
Once you have that link copied, go to the Medium post to which you want to add the recording. Go to wherever in the post you want to put the audio recording. I usually put it at the beginning. Create a new line, and click on the plus button.

Once that dialogue opens, select the two carats.
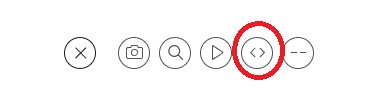
In that dialogue, paste the link that you copied over from SoundCloud, and hit return. It should show up like this.
Note that you won't be able to press play on the interactive widget until the post is live. You can't play it when you're in the editing screen.
Once it's there, anybody who's reading will simply have to press the play button to bring your post to life.
How To Add Audio Clip To Google Blog
Source: https://bettermarketing.pub/how-to-add-your-own-audio-version-to-your-blog-posts-943da86f068
Posted by: arrudalivine.blogspot.com
0 Response to "How To Add Audio Clip To Google Blog"
Post a Comment