

Divi Theme How To Make Blog Filterable
I'm a fan of blog design. I love to see how content is presented to the reader within a website's design. You've probably guessed that Divi's blog module is one of my favorite modules in the Divi Builder. I'm also a fan of third-party plugins that create blog modules with new features. One such module, called Divi – Filterable Blog Module, is a third-party plugin that adds several interesting features that I've not seen in a single module.
Divi – Filterable Blog Module can be used for blogs, search, author, category, tags, and even WooCommerce archives. As the name suggests, it adds a filter so your readers can see the categories or tags they're interested in. The module also includes an AJAX "Add More" button so your readers can see more posts. One of the most interesting features creates a magazine layout using featured posts.
Let's dive in!
Filterable Blog Modules in the Divi Builder

Once you upload and activate the plugin you'll see two modules added to the Divi Builder. The regular module lets you customize the fonts from featured posts and filterable posts independently (allowing you to override the styles for the filterable posts). The Lite version removes this feature, which reduces the size of the template and improves performance.
I like that the two modules are included. Having both modules gives you your choice between features and speed. I'm using the standard module in my examples.
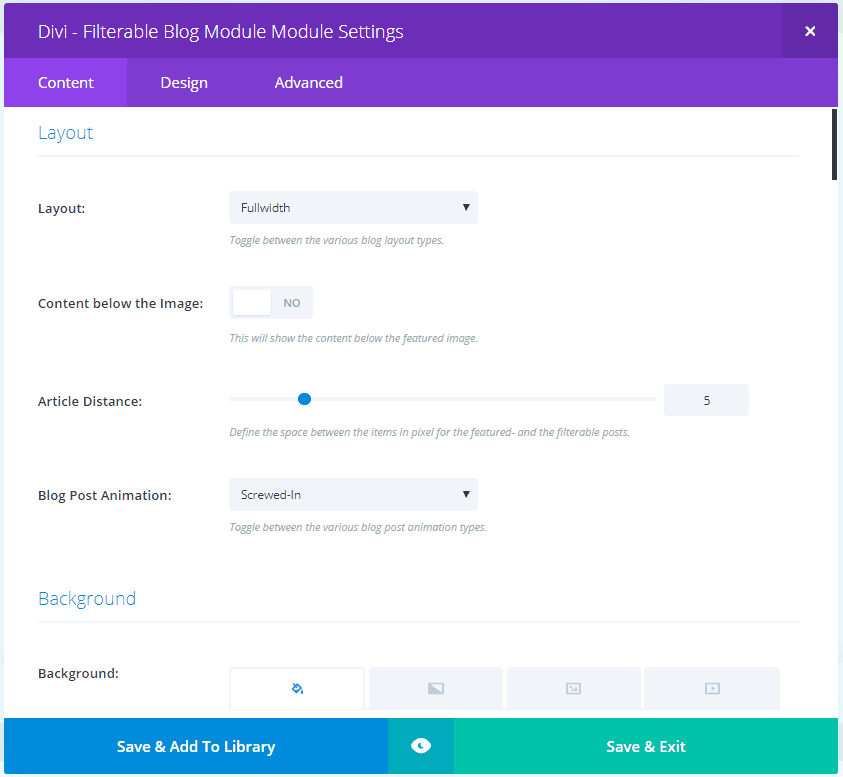
The Content Tab includes:
- Layout – includes layout (fullwidth and masonry), content placement, the space between items, and animation (screwed-in or fade-in).
- Background
- Featured Posts
- Category Navigation
- Post Options – shows post types for posts or projects, include and exclude categories and tags, post count, order options, and offset. By selecting tags instead of categories you can use the module for practically in custom post type.
- Content Elements – hide content, background color, show as overlay, overlay event (hover or click), show image, show header, post header tag, show excerpt, meta, and read more button.
- Pagination / Add-More-Button
- Overlay Settings
- Lightbox Settings
- Script Settings – CDN origin and audio/video feeds.
- Scroll Animation
- Admin Label
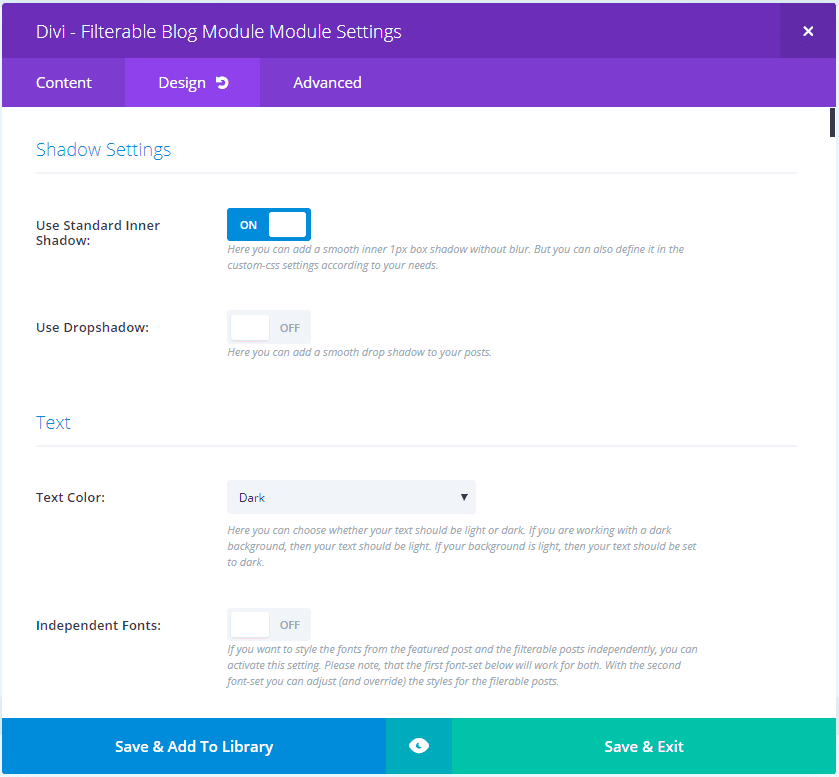
The Design Tab includes:
- Shadow Settings – inner shadow, drop shadow
- Text – color, Independent Fonts, orientation, shadow
- Image
- Header Text
- Meta Text
- Meta Link Text
- Post Content Text
- Body Text
- Pagination Text
- Pagination Current Text
- Header Filterable Posts Text
- Meta Filterable Posts Text
- Meta Link Filterable Posts Text
- Post Content Filterable Posts Text
- Body Filterable Posts Text
- Featured Posts – Read More Button
- Filterable Posts – Read More Button
- Add More Button
- Sizing
- Spacing
- Border
- Box Shadow
- Filters
- Animation
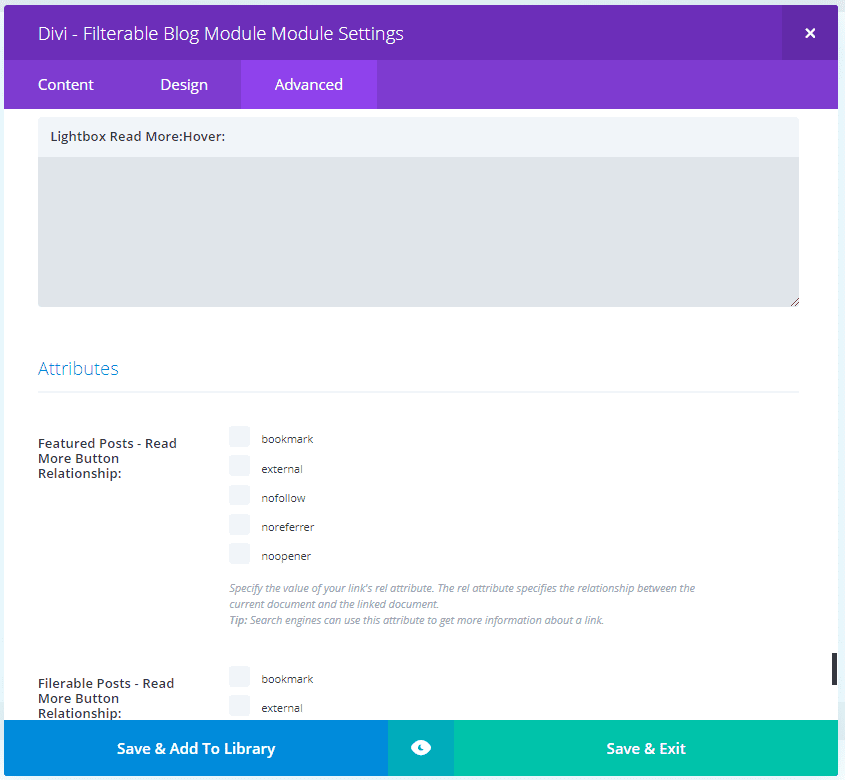
The Advanced Tab includes:
- CSS – all of the expected CSS features are here, but it includes a CSS box for virtually every style-able element.
- Attributes – includes featured posts read more button, filtered posts read more button, and add more button relationship
- Visibility
Most of the features are intuitive. Each setting includes a detailed description. There are lots of settings in the Design tab that have similar names and even more are added if you choose Independent Fonts. It might take some experimenting to figure out what some of them apply to.
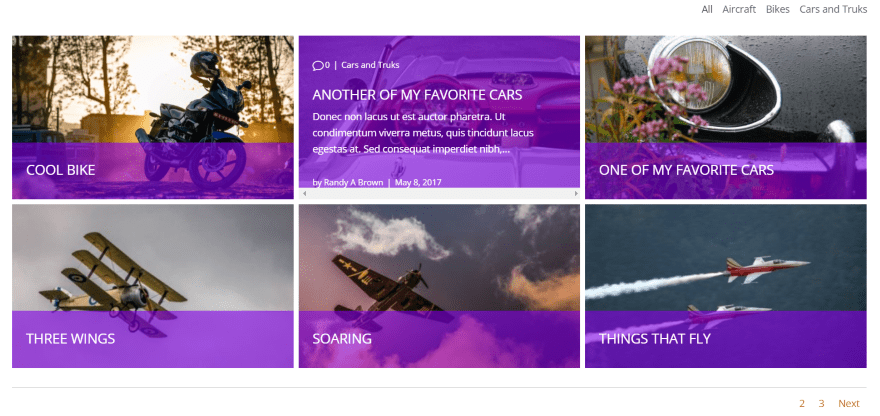
Filterable Blog Module Default Settings

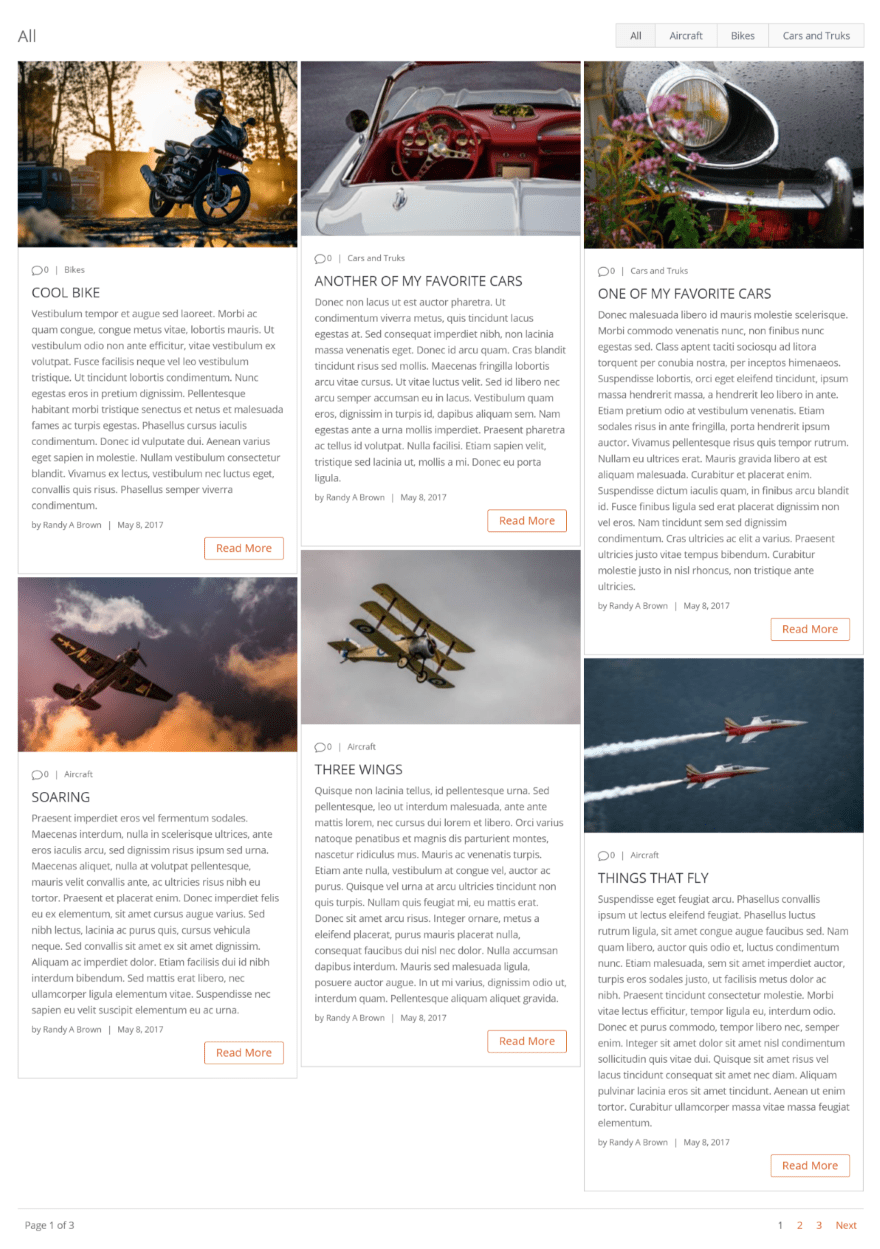
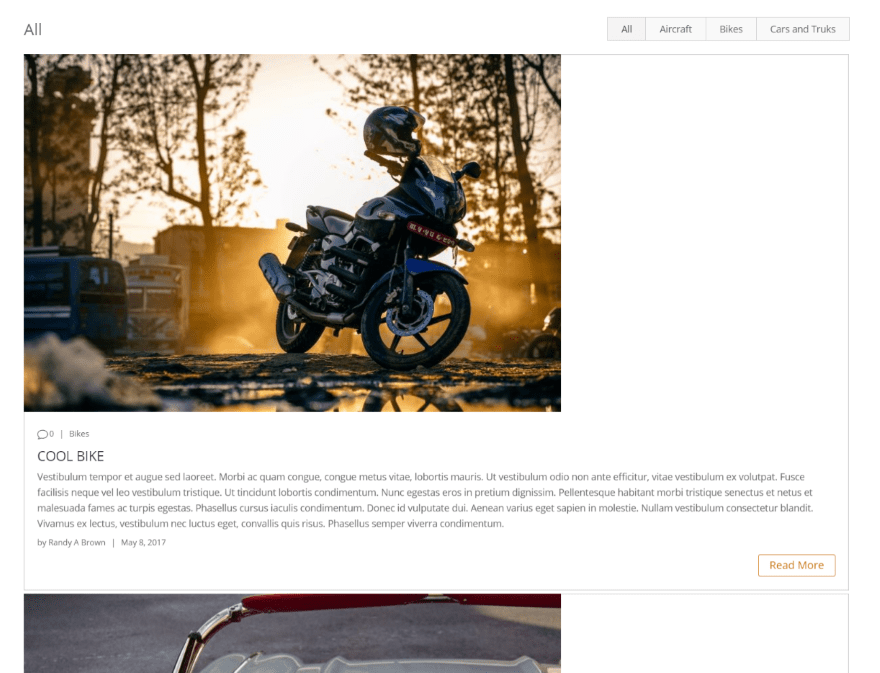
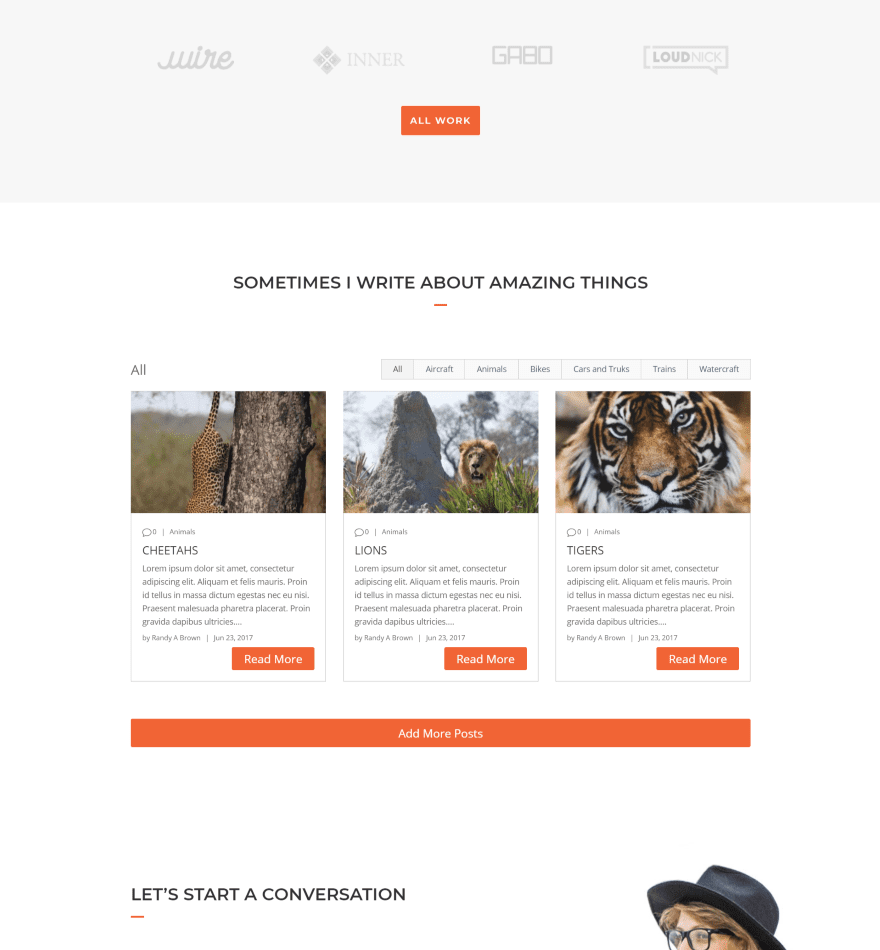
Here's a look at the Filterable Blog Module using the default settings. I chose a few specific categories. Those categories are listed in the filter at the top of the blog section. Clicking on a category filters out all of the others.
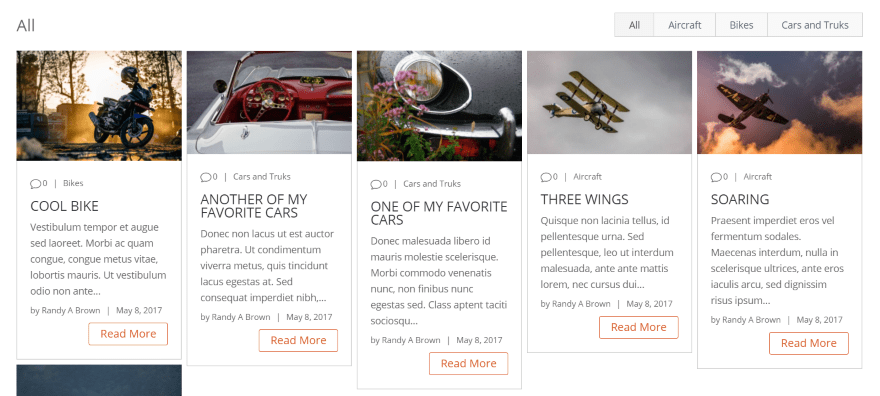
Here's the Filterable Blog Module using the masonry layout. By default we have some nice design elements added including layout design, a read more button with some styling added, post navigation, border, etc.
Filterable Blog Module Examples
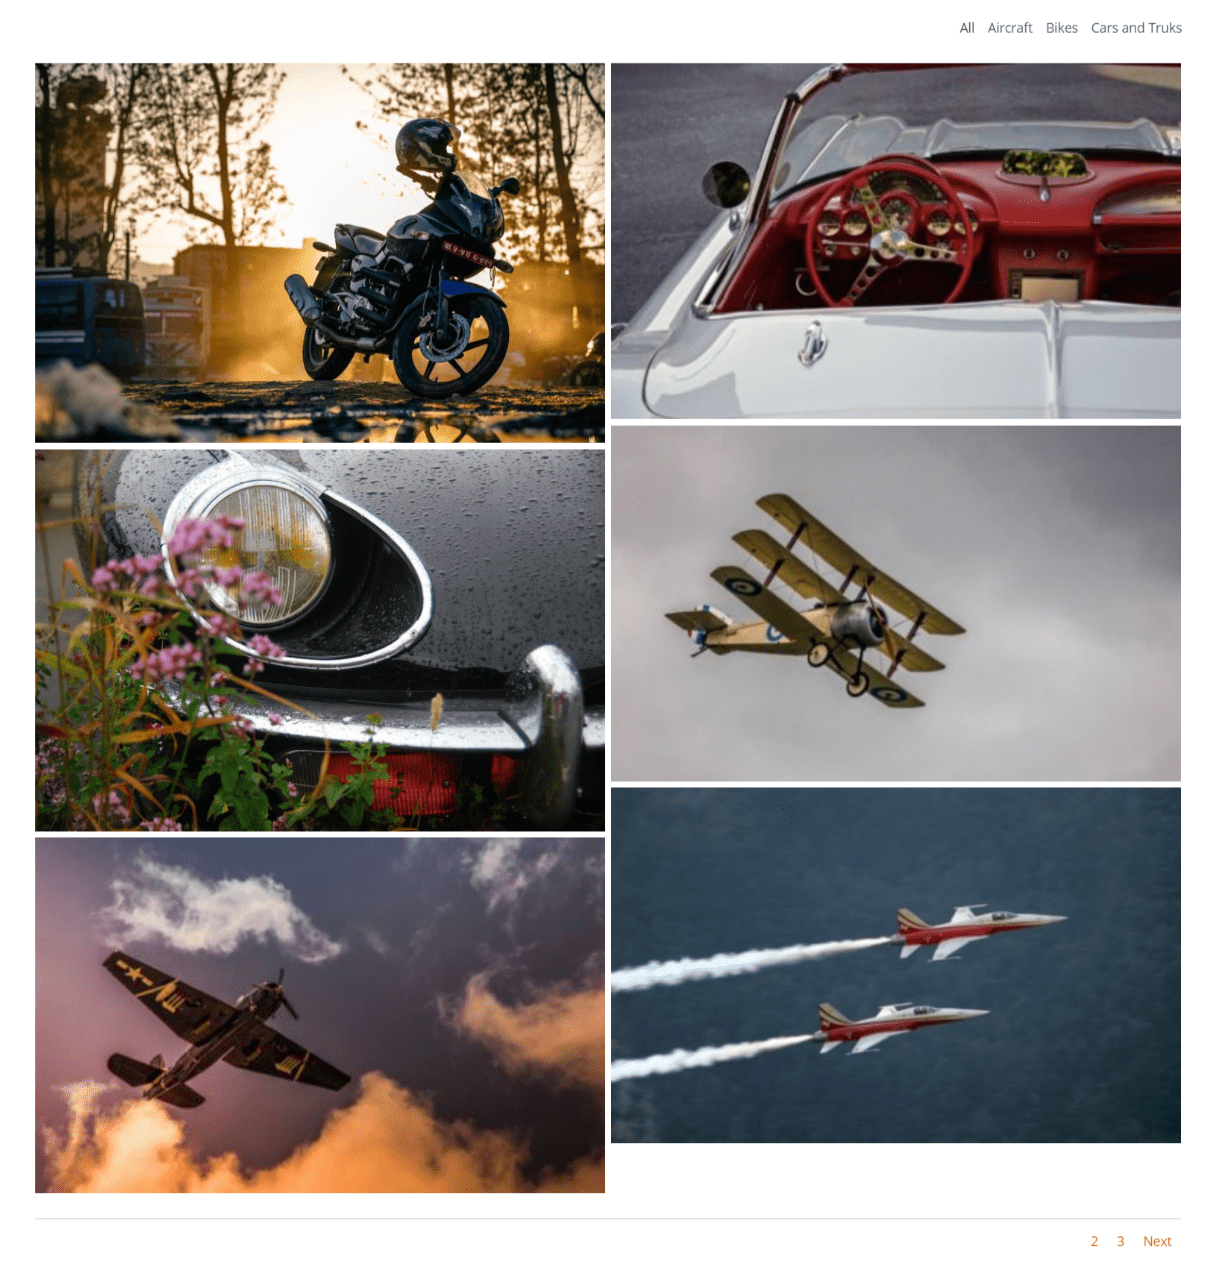
This is fullwidth with the content below the image.
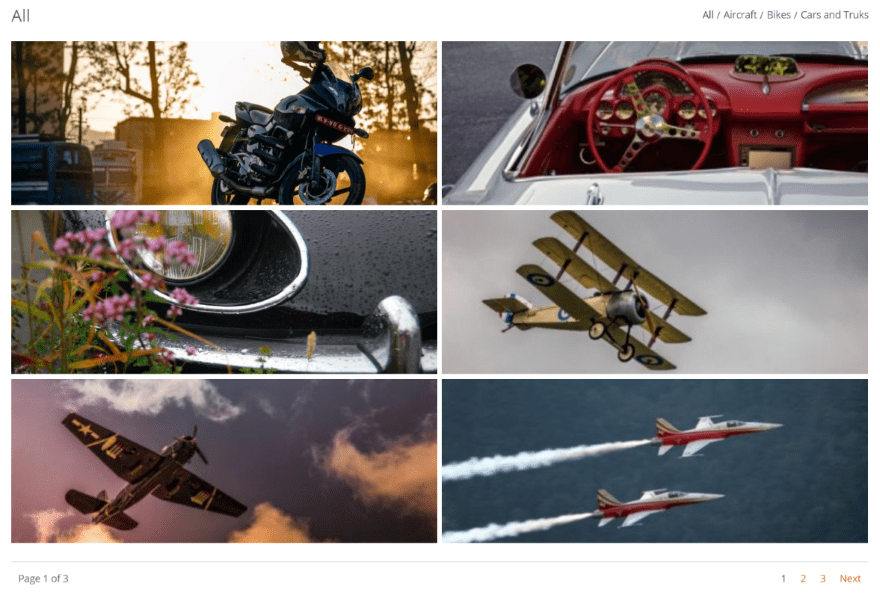
This one uses Masonry with the article distance increased from 5 to 7, maximum number of columns changed to 5, and word-count reduced to 20.
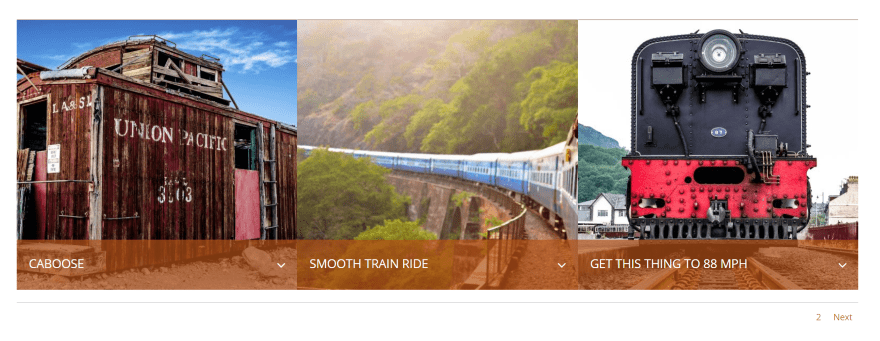
This example hides the content so that only the image displays. I've set it to show 2 per column. The filter shows text instead of buttons.
This example sets the images to the same height. I'm using the default setting, but you can set your own pixel-height if you want.
This one uses an overlay with text set to light. The text displays on hover and is scrollable.
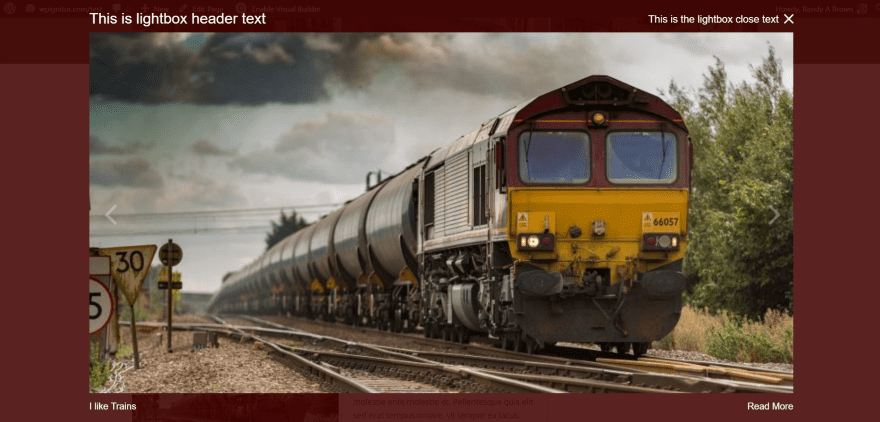
This uses Lightbox. The images for the blog posts open in a lightbox. It includes a read more button, the image caption, and arrows to navigate between blog posts. I've added header and close text, a background color, and placed the image above the text.
This one sets the article distance to 0 to remove the space between them. I've set the image size to the same and set it to 440 pixels. It's using a content overlay and I've styled the background.
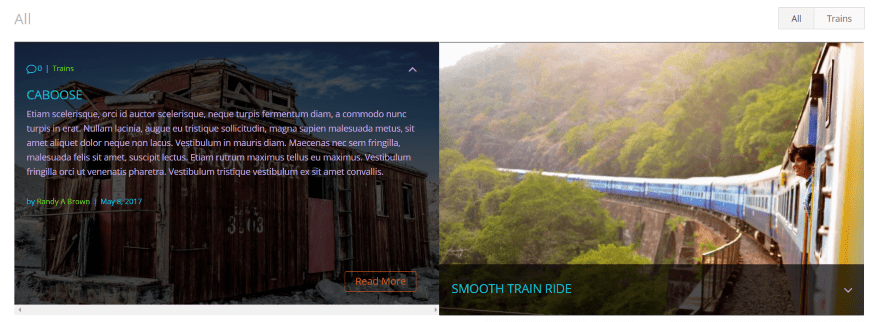
Here I've adjusted the colors of the meta and content text. You can style all of the text independently.
Using Filterable Blog Module for Projects
The module also displays Project post types. This example uses the portfolio page from the Copywriter layout pack. I've replaced the portfolio with the Filterable Blog Module. I'm using 3 columns with the masonry layout with an article distance of 30. I'm hiding the category filter, but I can see an advantage in using it for this. We'll add it back in for our Extra example.
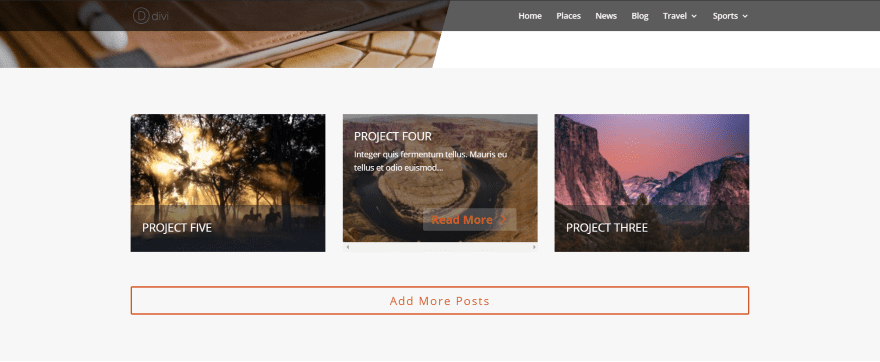
I'm showing the content as an overlay over a dark background with around 50% transparency. I've limited the content to 10 words and disabled all meta information. I've enabled the Add More button and styled it separately from the Read More button.
This one uses the module as a filterable blog. I've styled the read more and add more buttons to match the styling of the layout. I've included a little bit more of the layout so you can see how it blends. It fits in perfectly with the design.
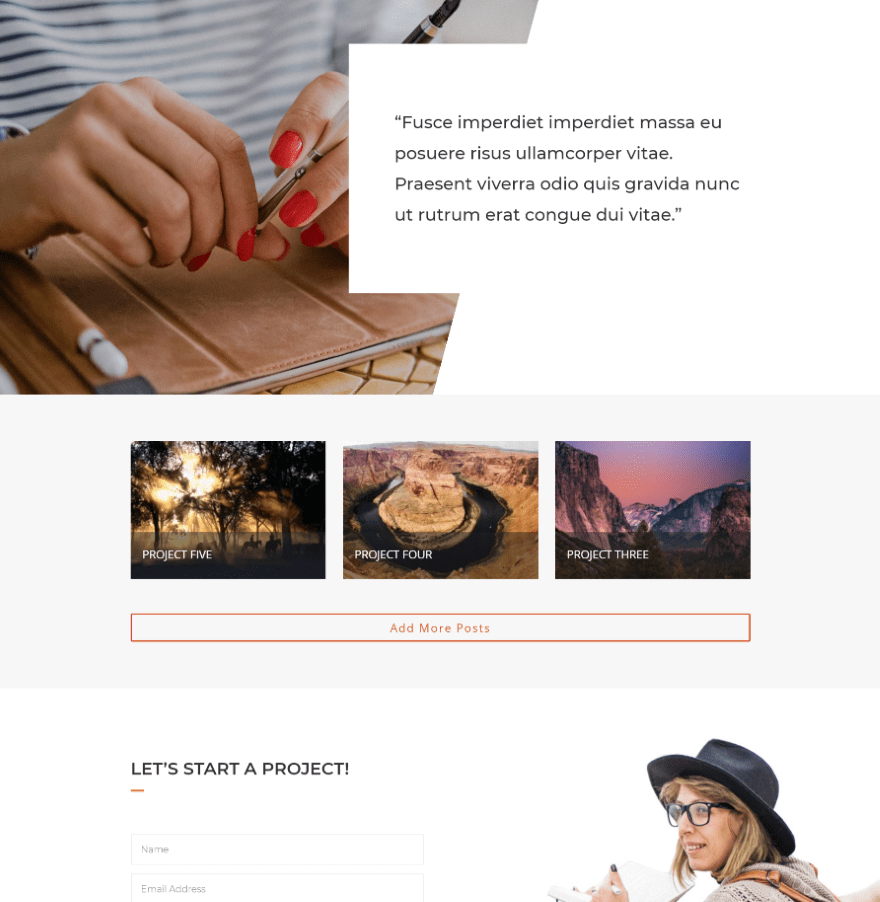
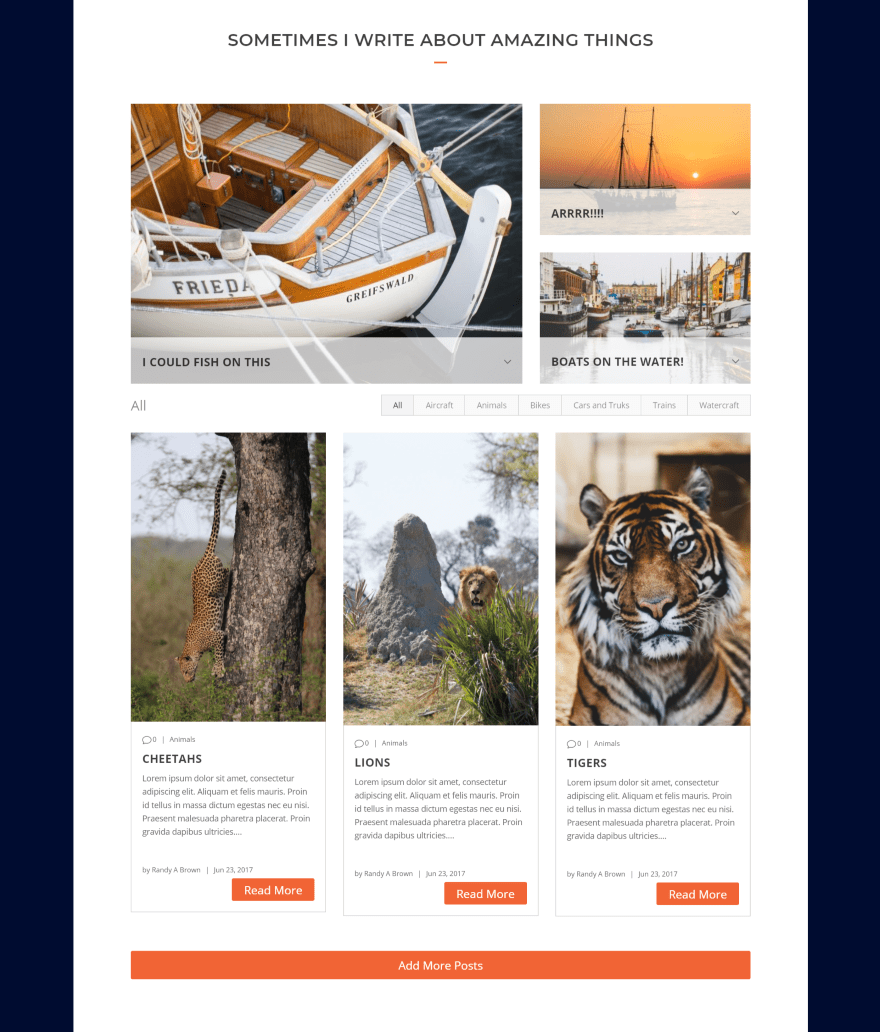
Create Featured Posts with Filterable Blog Module
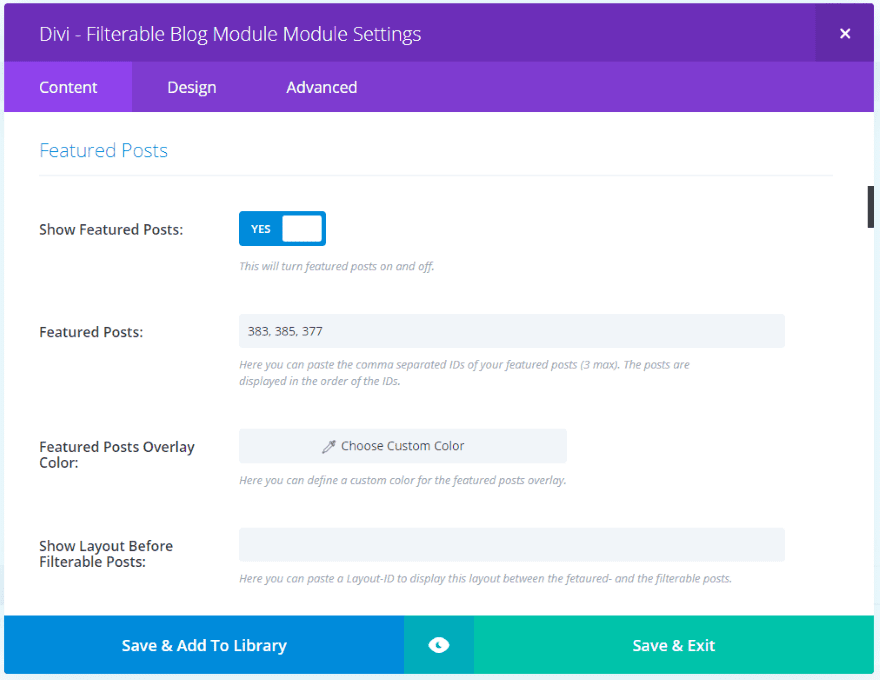
One of the more interesting features is Featured Posts. This creates a magazine-style layout. Add the post ID's separated by comas. You'll find the post ID in the address bar of the post on the post's edit screen (it will show post= and give the number). You can adjust the featured posts' overlay within these settings.
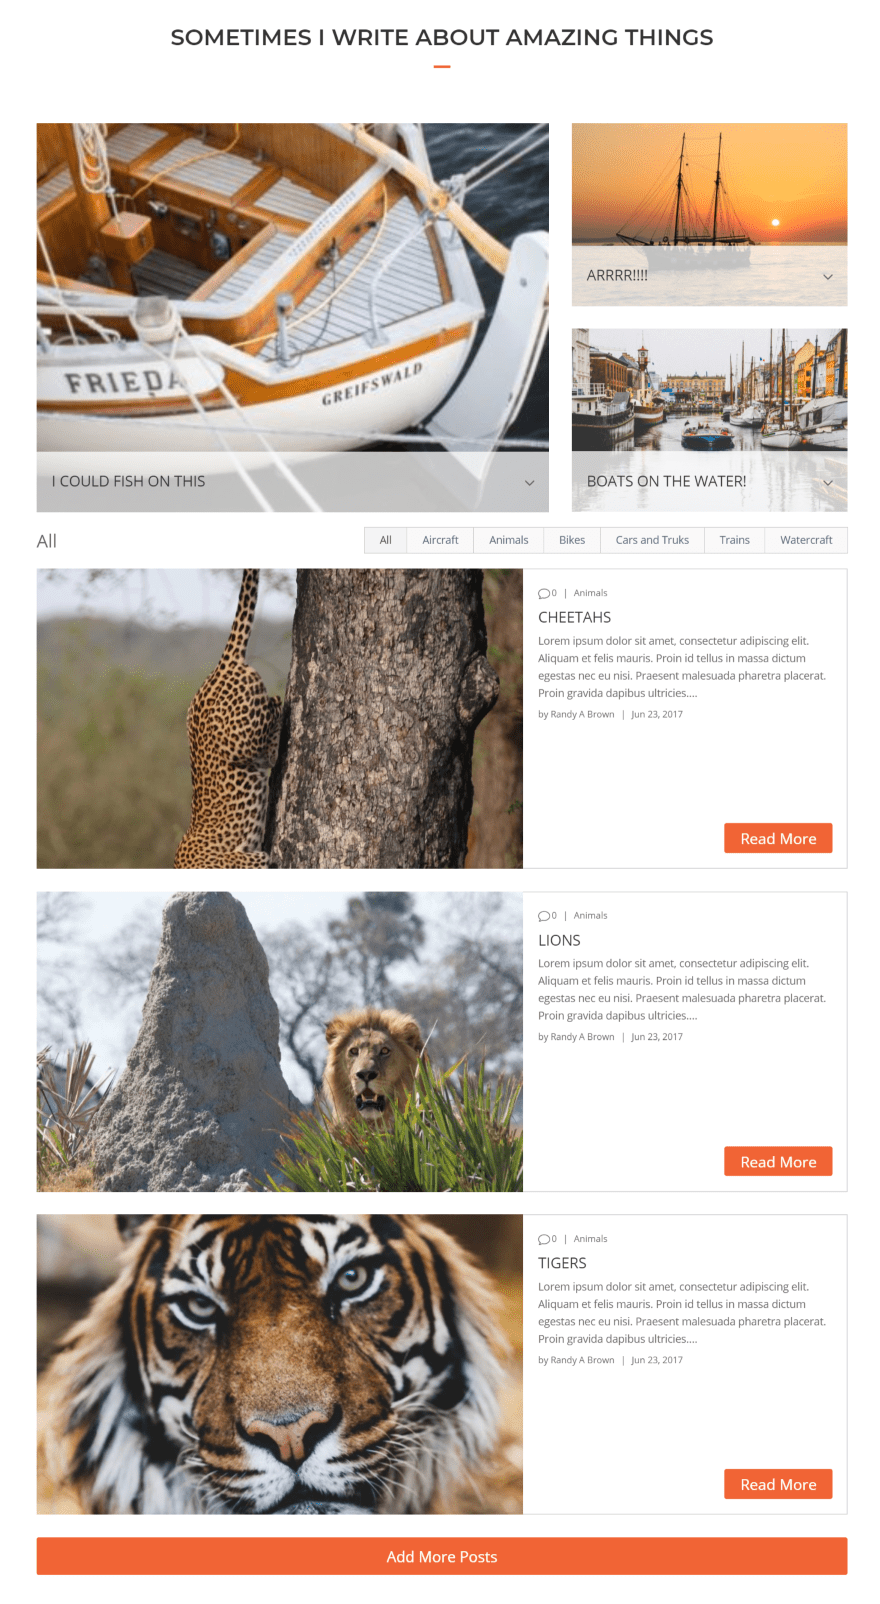
Here's the result. This one uses the fullwidth layout, which displays the blog posts under the featured posts in full-width mode. The featured posts display with one large image and two small images to create a magazine layout.
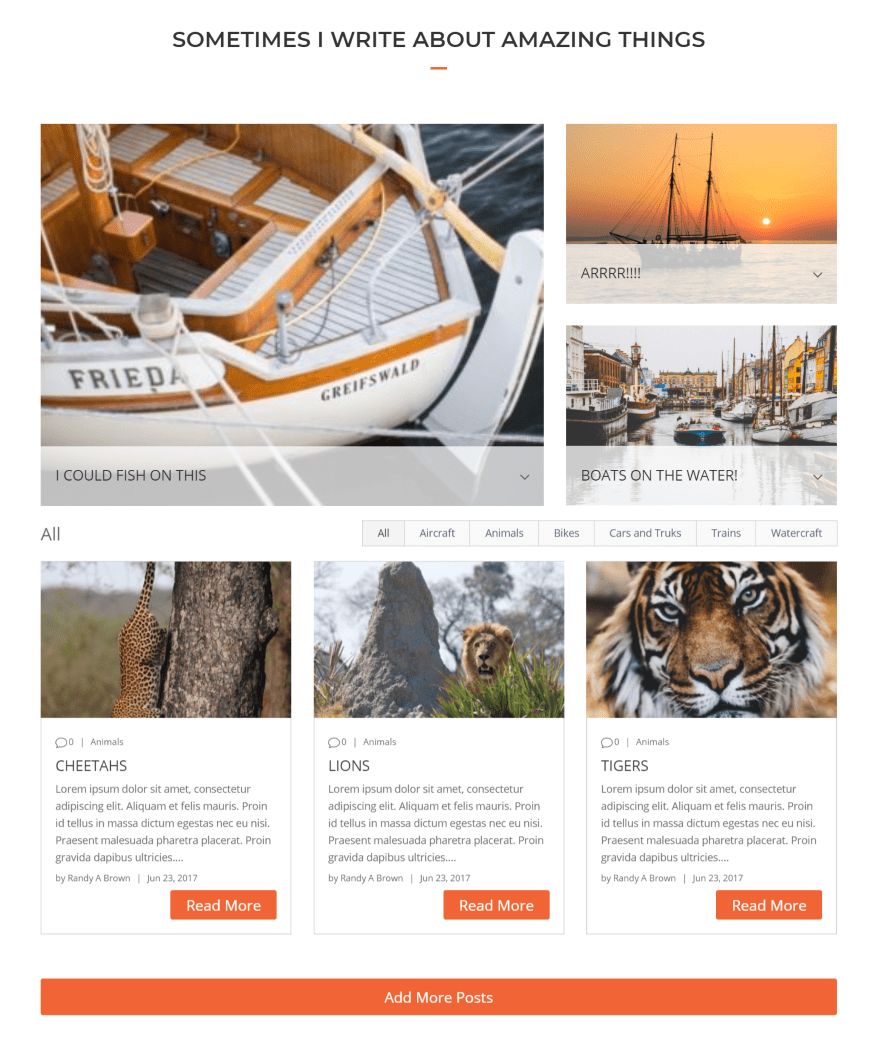
This is the same settings with the masonry layout. I could have disabled the filter if I wanted the featured posts and blog posts to blend together better. Something else interesting is the ability to place other layouts between the featured posts and blog posts.
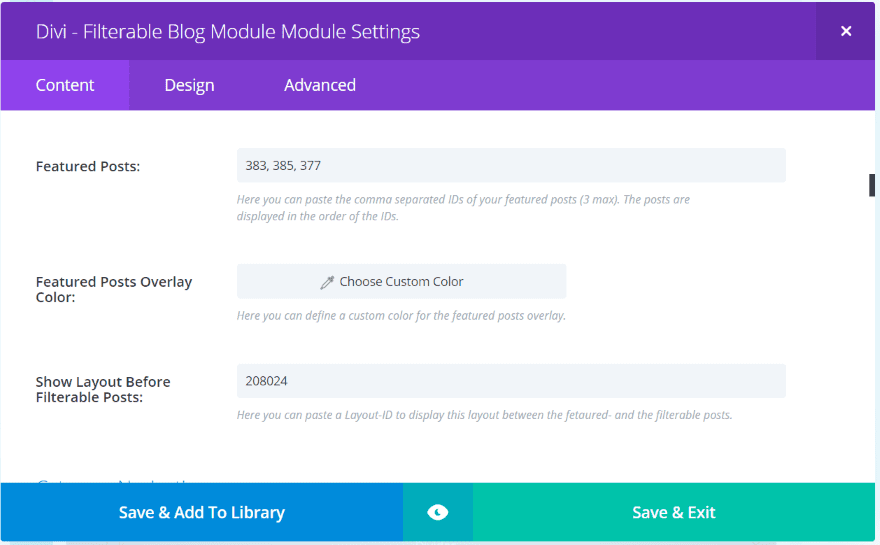
Add a layout ID to display a layout from my Divi Library between the featured posts and the blog posts. Get the layout's ID from the Divi Library and paste it in the field labeled Show Layout Before Filterable Posts.
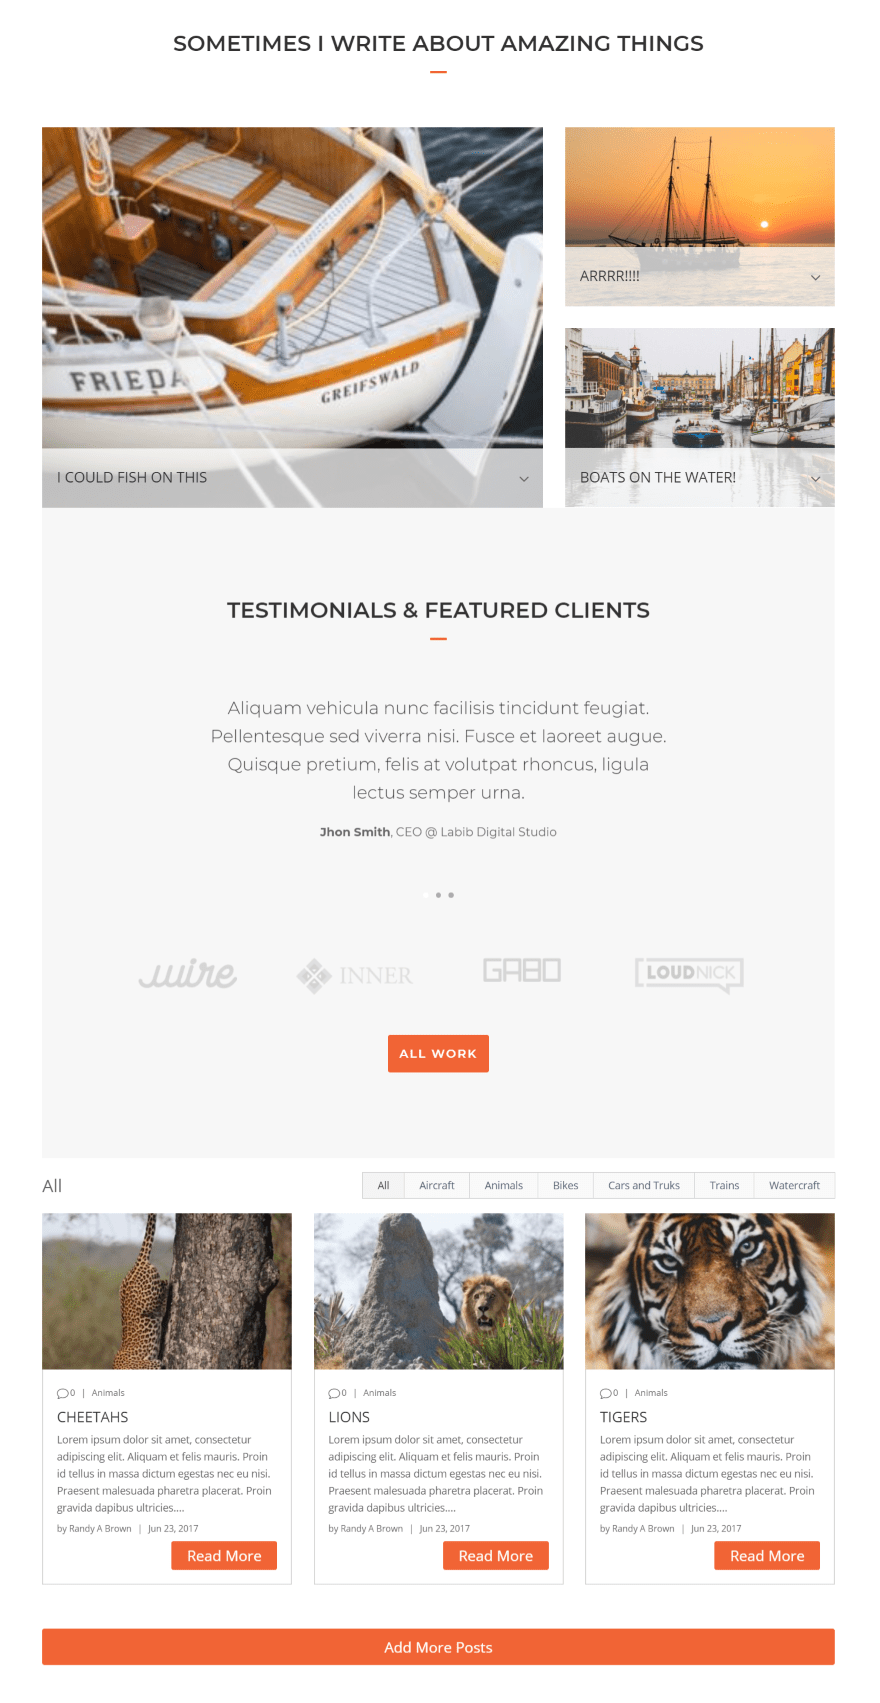
I saved one of the sections from the Copywriter layout to the library and then added its ID to display.
Using Filterable Blog Module with Extra
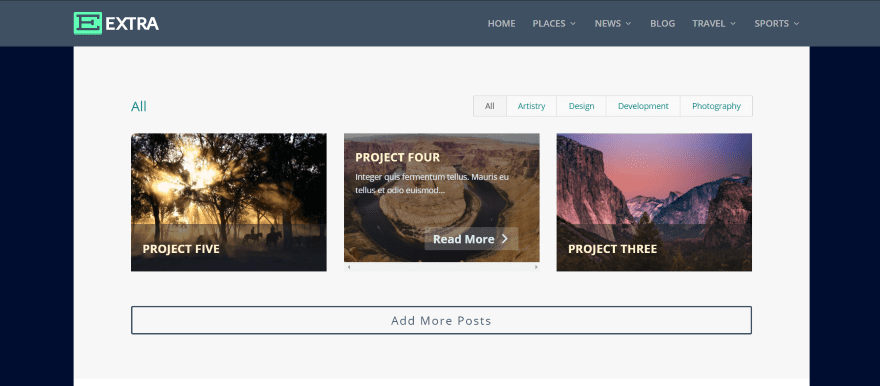
It works perfectly with Extra. In this example I did some more styling to the Projects example within the Copywriter layout pack. I've styled the header text, content text, read more text, add more text, and the filter text.
This is the Featured Posts design from the Divi example above with a masonry layout. The posts images automatically conform to Extra's design, which can be adjusted manually within the module.
License and Documentation
The plugin can be installed on unlimited websites for you and your clients. Documentation includes video tutorials, a blog article.
See the developer's website for purchase information.
Ending Thoughts
I didn't have a lot of negatives when testing the plugin. All of the styling I wanted was there, but some of it was a little difficult to find. For example, the filter styling is labeled Body Text. I was able to style the filter text, but the labeling made it difficult to figure out what I was styling.
Also, I could style the header text if I enabled Independent Fonts. If I disabled it, the styling was still there but the feature to change the styling was hidden. Once I figured this out it was easy to style anything I wanted. I would like the ability to change the read more and add more text. I could style the button but I couldn't change the wording.
Divi – Filterable Blog Module adds some interesting features and creates lots of blog design possibilities. Create a magazine layout, blog feed, or a feed with any custom post type – and each them is filterable. The Add More button is a nice bonus. You could create a layout with this module alone, and you could even have it display other modules within your layout.
My examples just getting started with the styling you can do with this plugin. If you're interested in adding some new and interesting features to your blog feed, Divi – Filterable Blog Module might be the plugin you're looking for.
We want to hear from you. Have you tried Filterable Blog Module? Let us know what you think about it in the comments.
Featured Image via PODIS / shutterstock.com
Divi Theme How To Make Blog Filterable
Source: https://www.elegantthemes.com/blog/divi-resources/divi-plugin-highlight-divi-filterable-blog-module
Posted by: arrudalivine.blogspot.com
0 Response to "Divi Theme How To Make Blog Filterable"
Post a Comment